How To Choose A Car Battery Check Before A Long Trip
A practical step-by-step guide to how to choose a car-battery check before a long trip, including preparation, instructions, common issues, tips, and next steps.
How To Choose A Car Battery Check Before A Long Trip
This guide explains how to check your car battery before a long trip. It covers simple visual checks, voltage testing, load testing, and when to replace the battery. The goal is to help you avoid starting problems and breakdowns far from home.
Fast Answer
- Inspect the battery case and terminals for dirt, corrosion, cracks, or swelling, and clean any corrosion with a wire brush and a baking soda solution.
- Use a digital multimeter to check the resting voltage; it should be at least 12.4 volts. Then, start the engine and check that the voltage rises above 13.5 volts while running.
Before You Start
- Gather a digital multimeter, safety glasses, a wire brush or battery terminal cleaner, baking soda, water, a towel or rag, and a car owner's manual.
- Check the owner's manual for the manufacturer's recommended battery maintenance and, if possible, the battery's age. Most batteries need replacement every three to five years.
- Ensure the engine is off and the keys are out of the ignition before starting any battery inspection or testing.
- If you have a newer vehicle with start-stop or advanced electronics, be aware that it may have special battery requirements; consult the owner's manual for guidance.
Step-by-Step Instructions
Do a Visual Inspection of the Battery
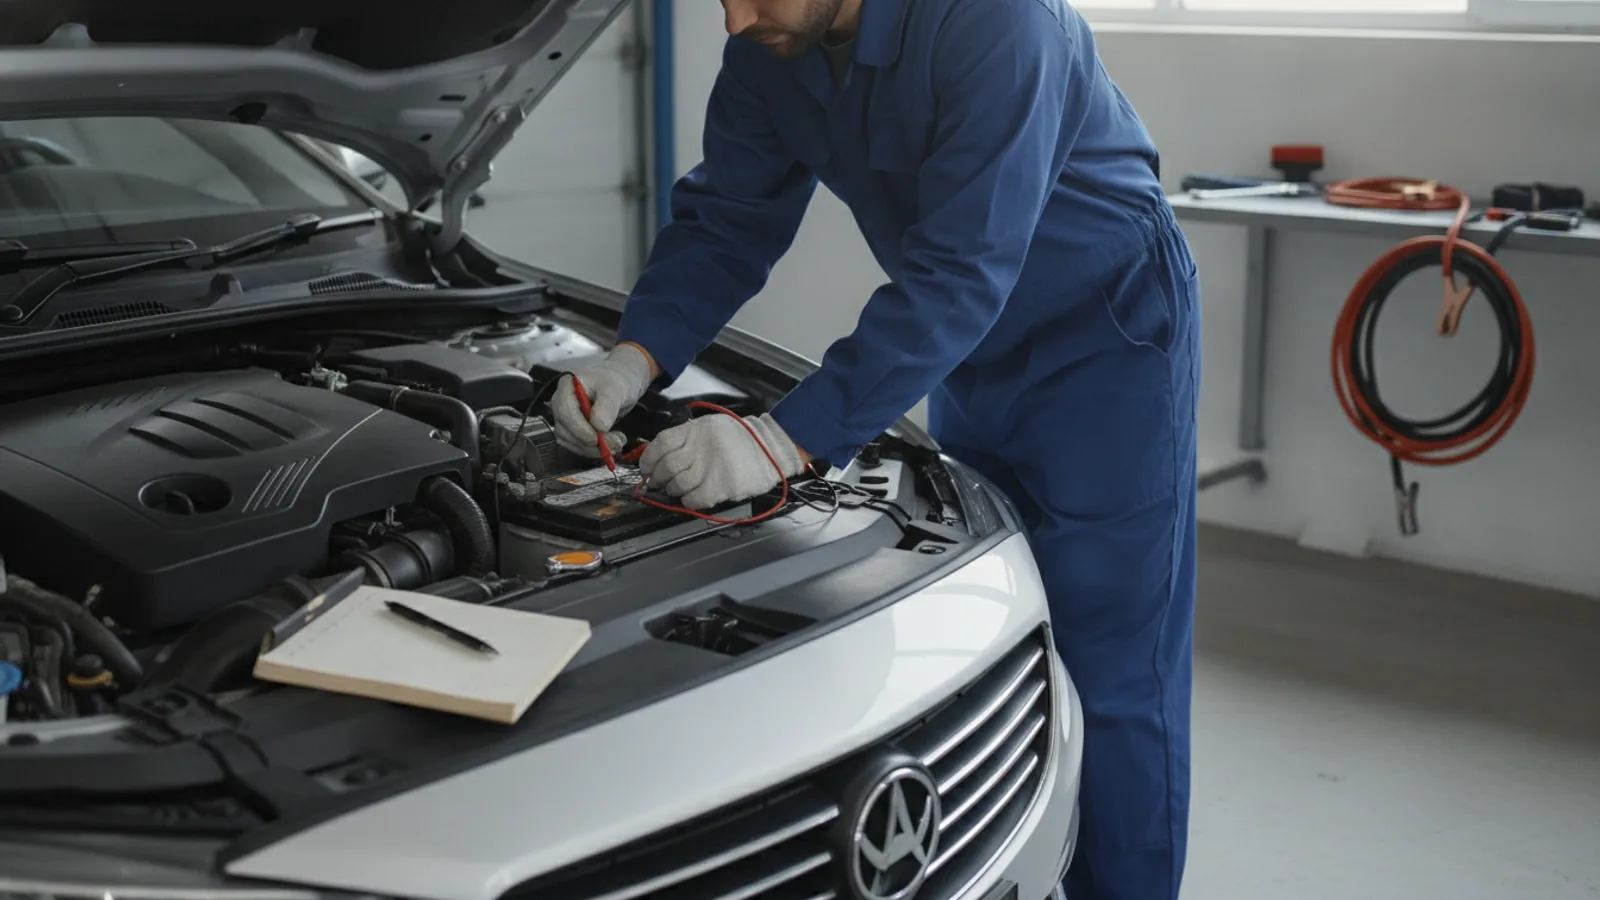
Start with your eyes. Pop the hood and look at the battery case and its terminals. Check the sides and top for cracks, bulges, or leaks. A swollen or cracked case means the battery is failing and should be replaced before your trip. Look at the terminal posts and cable clamps. If you see a white, bluish, or crusty powder, that is corrosion. It can block the flow of electricity. Also, check that the battery is held securely in its tray. A loose battery can bounce around, causing internal damage or short circuits. While you are at it, inspect the cables for any fraying or wear. A good visual check can catch many problems early. For example, corrosion on the positive terminal might cause a slow start. If you see a lot of corrosion, clean it off with a wire brush and a baking soda and water paste (one tablespoon baking soda to one cup water). Rinse with plain water and dry with a rag. If the case is damaged, do not try to fix it. Get a new battery. Also, examine the battery's built-in charge indicator if it has one. A green or blue dot often means it is in good condition, but a dark or clear dot means it needs charging or replacement. This check takes only a few minutes and can save you from a breakdown later. If you notice any loose connections, tighten the bolts or clamps, but do not over-tighten them. Remember to reconnect the positive cable first to avoid short circuits.
Perform a Simple Voltage Test
Get a digital multimeter and set it to DC volts. The scale should be 20 volts or lower. Touch the red probe to the positive battery terminal and the black probe to the negative terminal. Read the voltage. A fully charged battery that has been sitting for at least an hour should read about 12.6 volts. If it reads 12.4 volts, it is about 75 percent charged. A reading of 12.2 volts indicates around 50 percent charged. If you see 12.0 volts or lower, the battery is discharged and may not start the car reliably. This test gives you a quick idea of the battery's state of charge, but it does not tell you if the battery can deliver the high current needed for starting. A battery with a higher voltage may still be weak. So, after this test, do the cranking test in the next step. Also, let the car sit overnight and test the voltage in the morning. If it drops significantly, the battery may have a problem, or there may be a parasitic drain. To do this test accurately, make sure the engine is off and all lights and accessories are off. Also, close the doors and trunk. Wait a few minutes for any system to shut down. Record the reading. If it is below 12.4, charge the battery with a battery charger and then test again. If it still does not charge to 12.6 or higher, the battery may be failing.
Test Battery Under Cranking Load
This test checks if the battery can handle the heavy load of starting the engine. With the battery voltage meter still connected to the terminals, have a helper turn the ignition key to start the engine. Watch the voltage at the moment of cranking. For a healthy battery, the voltage may drop to around 10.0 to 10.5 volts, but it should not dip below 9.5 volts. If it drops below that, the battery is weak and may not start your car on a cold morning. If the voltage stays above 11.5 volts while cranking, the battery is likely strong. Do this test carefully in a well-ventilated area. Make sure the transmission is in Park or Neutral and the parking brake is set. If the engine starts, let it run. Check the voltage with the engine running. It should be between 13.5 and 14.8 volts. If it is much lower, the alternator may not be charging the battery. If it is much higher, the alternator may be overcharging, which can damage the battery. This test also helps you find a weak battery that might still start the car when warm but fails when it is cold or after a short stop. If you do not have a helper, you can use a remote starter button or just observe the voltage readout yourself. But it is easier with two people. Note that a battery that passes this test may still have a bad cell that only shows up under a more precise load test. So, if you suspect trouble, get a load test at a service center.
Use a Battery Load Tester
A load tester puts a controlled electrical load on the battery and measures how well it holds voltage under that stress. Many auto parts stores have them, or you can buy a portable one. To use it, connect the clamps to the battery terminals, positive to positive, negative to negative. Follow the tool's instructions. For a standard battery, you usually apply a load equal to half of the battery's cold cranking amps rating for 15 seconds. Then, read the voltage. If it stays above 9.6 volts, the battery is in good condition. If it drops below 9.6 volts, the battery may be weak or have a bad cell and should be replaced. Some load testers also test the starter and alternator. This test is more reliable than a simple voltage test because it checks the battery's ability to deliver current. If you do not have a load tester, you can use the cranking test from the previous step. However, a load tester is more precise. For example, a battery with 12.6 volts at rest might fail a load test because it has a weak cell. If the load test fails, the battery needs to be replaced. You can also check the battery's CCA rating, which is often printed on the battery label. If the tester shows the CCA is lower than the rated value, the battery has degraded. Remember, a load test is a more accurate way to determine battery health than just measuring voltage. If you are not comfortable doing this yourself, a service center can perform it quickly. But always test in a safe environment and avoid touching the clamps while the test is running.
Consider Battery Age and Performance
Check the manufacturing date on the battery. On many batteries, a sticker or an embossed code shows the month and year, such as a letter for the month and a number for the year. If the battery is over three years old, it is a good idea to replace it before a long trip, even if it tests fine. Batteries lose capacity as they age, and a sudden failure is more likely in an older battery. Also, look at how the battery behaves in daily use. If you have needed to jump-start the car several times, the battery may be getting weak. If the engine cranks slowly in the morning, that is another sign. If your car sits unused for weeks, the battery drains. If it needs frequent charging, it might be time to replace it. Also, consider the climate. Hot climates shorten battery life. In cold weather, a weak battery may fail. So, even if the voltage is good, the battery may not have enough reserve power for a long trip, especially if you use accessories like lights and wipers. If you are unsure about the age, look for a label or use the owner's manual. If the battery is more than three years old, it is a good practice to replace it before a long trip. This is a preventive measure. The cost of a new battery is lower than the cost of a tow truck and a missed trip. Also, check the battery's warranty; many batteries last three to five years. Using a battery that is close to the end of its life is risky.
Clean and Secure the Battery
A clean battery works better. Dust, dirt, and corrosion can create a path for electric current to leak, which drains the battery. So, after testing, clean the battery top and terminals. First, disconnect the negative cable (usually black) then the positive (usually red). Use a wire brush to scrub the terminals and the inside of the cable clamps. A mixture of baking soda and water can neutralize acid corrosion. After cleaning, rinse with clean water and dry thoroughly. Then, reconnect the terminals, positive first, then negative. Tighten them securely, but do not over-tighten. Check that the battery is clamped down firmly in its tray. A loose battery can vibrate, which can damage the internal plates and cause a short circuit. Use a battery hold-down bracket or clamp. If the battery is not secured, tighten the bolts. Also, check the battery cables for any worn insulation or frayed wires. If you notice any damage, repair or replace them. A poor connection at the battery can cause a no-start condition even if the battery is fully charged. Finally, apply a thin layer of petroleum jelly or battery terminal protectant to the posts and clamps to prevent future corrosion. This step may seem minor, but it ensures that the battery delivers full power to the starter. If you have a battery with removable caps, check the electrolyte level if the manual says it is possible. Distilled water may be needed. But many modern batteries are sealed and do not require this.
Quick Reference
| Situation | Action | Why it helps |
|---|---|---|
| You see white, crusty corrosion around the battery terminals. | Disconnect the negative cable first, then the positive, clean the terminals with a wire brush and a baking soda and water paste, rinse with water, dry, and reconnect positive first. | Corrosion resists the flow of electricity and can cause slow starts or a dead battery, so cleaning ensures a strong connection. |
| Resting battery voltage is below 12.4 volts | Charge the battery with a suitable battery charger once, wait a few hours, and retest; if it remains below 12.4 volts, replace the battery. | A low voltage indicates a low state of charge, and repeated failure to hold a charge means the battery is likely degraded. |
| Battery is over three years old and you are planning a long trip | Replace the battery before departure, even if it currently passes voltage and load tests, because aging batteries fail unpredictably. | Older batteries are more likely to fail suddenly under the extra strain of a long trip, and a new battery gives peace of mind and reduces breakdown risk. |
Common Issues
- Battery test shows only 12.2 volts even after charging: This suggests the battery cannot hold a full charge, so it is likely sulfated or has a bad cell. Replace the battery with a new one that meets your car's specifications.
- Car starts fine sometimes but is slow to start on other occasions: Check the battery, but also inspect the starter and alternator. A weak battery or a failing starter can cause intermittent slow cranking. Perform a load test and have a professional check the charging system.
- Corrosion keeps coming back on the terminals even after cleaning: Clean and dry the terminals, apply an anti-corrosion spray or a thin layer of petroleum jelly, and ensure the battery vent caps are not blocked. If it persists, the battery may be leaking acid, so consider replacing it.
Advanced Tips
- If your car is stored for weeks before a trip, invest in a battery maintainer that automatically monitors and keeps the battery at the right state of charge, preventing sulfation and self-discharge.
- Learn how to read the battery date sticker: the month as a letter (A for January, B for February, etc.) and a digit for the year, so you can budget for a replacement before it fails.
- Consider having the charging system output tested at the same time as the battery, since an overcharging alternator can quickly ruin a new battery, and an undercharging alternator will leave you stranded.
Final Checklist
- Battery case is clean, free of cracks, and tightly secured in its tray.
- Battery terminals are clean, corrosion-free, and connections are tight (positive and negative cables).
- Resting battery voltage is at least 12.4 volts and cranking voltage stays above 9.5 volts.
- Battery age is within three to five years, and if older, consider replacement before the trip.
FAQ
How often should I check my car battery before a long trip?
It is wise to check the battery at least two weeks before departure. This gives you time to conduct voltage and load tests, replace the battery if necessary, and ensure everything is working before you are far from home.
Can I test my car battery without a multimeter?
Yes, you can perform a basic observation and attempt to start the vehicle. If the engine cranks quickly and consistently, the battery may be fine, but for a reliable assessment, a multimeter or a professional load test is recommended because a battery can have enough voltage to crank but still lack reserve capacity.
What is the best way to clean battery corrosion without damaging the car?
Always disconnect the negative cable first and positive last. Use a wire brush to clean the posts and clamps, and a paste of baking soda and water to neutralize acid. Rinse with plain water, dry thoroughly, and reconnect the positive first. Avoid getting the paste on painted surfaces, and wear safety glasses.